

As a beginner artist, I recall attempting to draw an eye, and failing multiple times. There wasn’t online tutorials back then to help me learn. And so I offer this tutorial to offer some of you the advice and tips you require when attempting to draw an eye.
Step 1 – Sketch
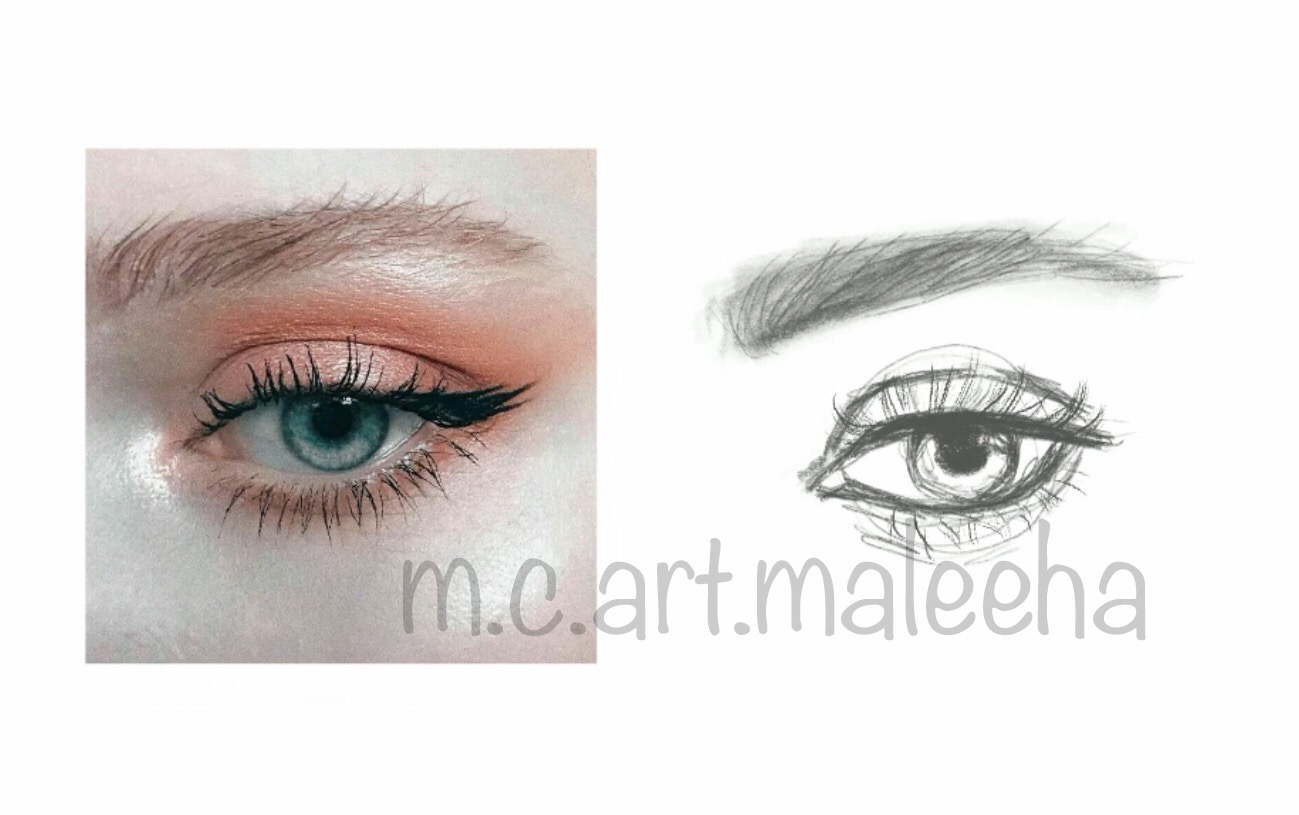
I begin with a sketch. Important tip to remember is that the eye is not rugby ball shaped and the corners to don’t meet to a sharp point. Instead the eye haas higher and lower point – higher is the upper corner of the eye and lower is the bottom. The lids also wrap around the eyeball, so try to replicate the curve. Also important to note is the pupil in the eye generally gets covered a little by both lids, so it’s not a full circle in the center of the eye.
Step 2 – Color
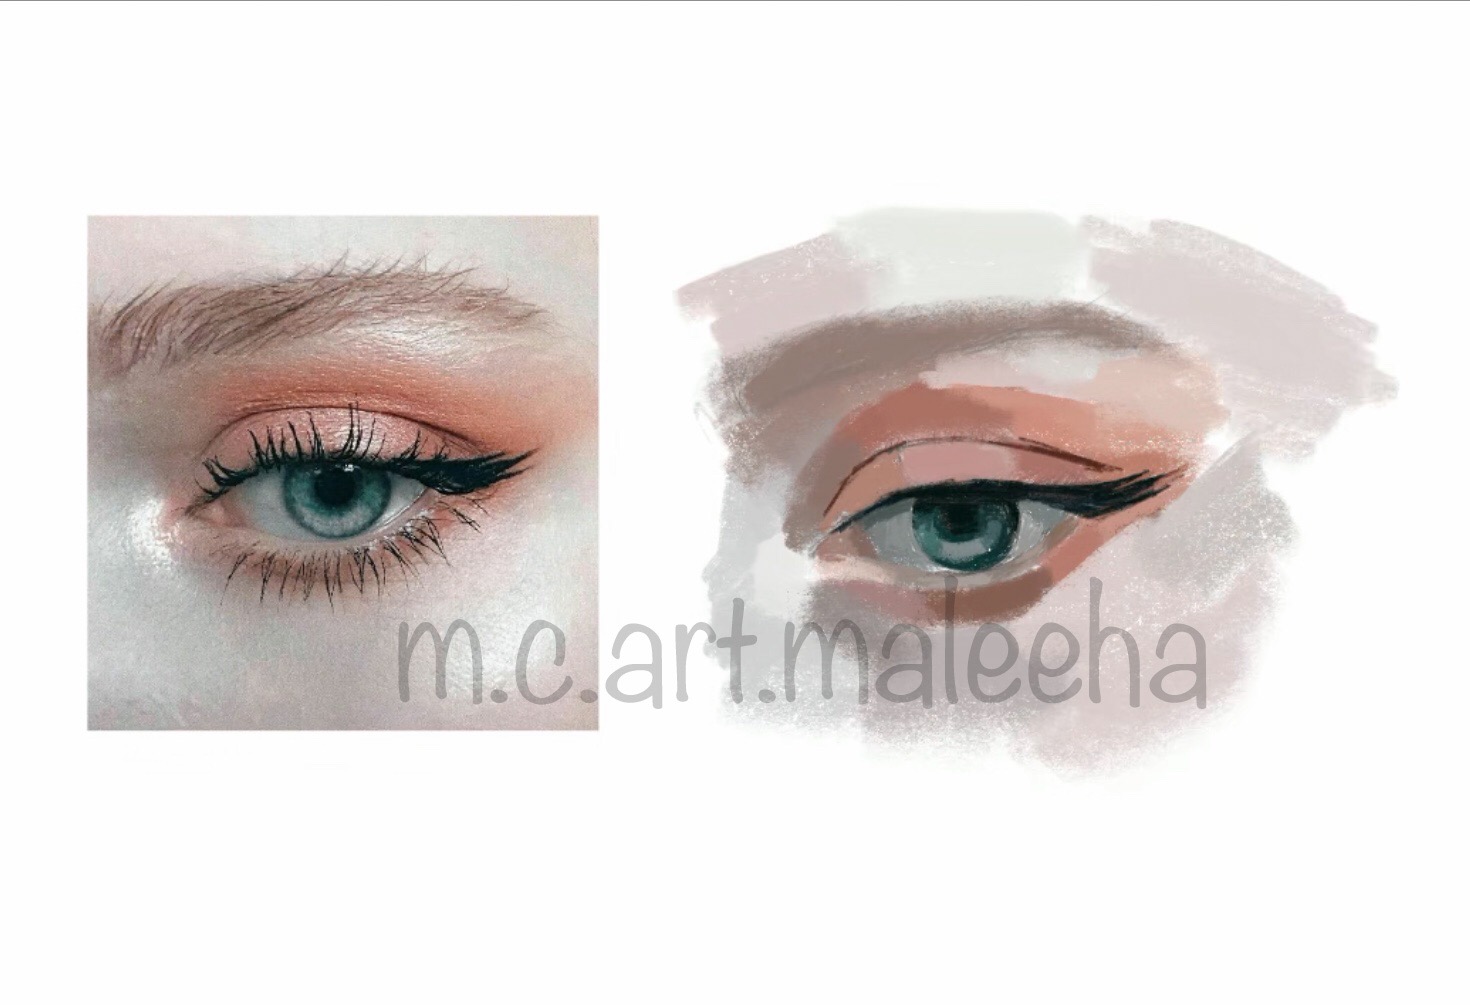
Next step is to add the base colors. Use a color picker tool to find the colors and look for light, medium and dark tones. Focus on the placement of lights and shadows. Correct values are the key to a realistic image.
Step 3 – Blend
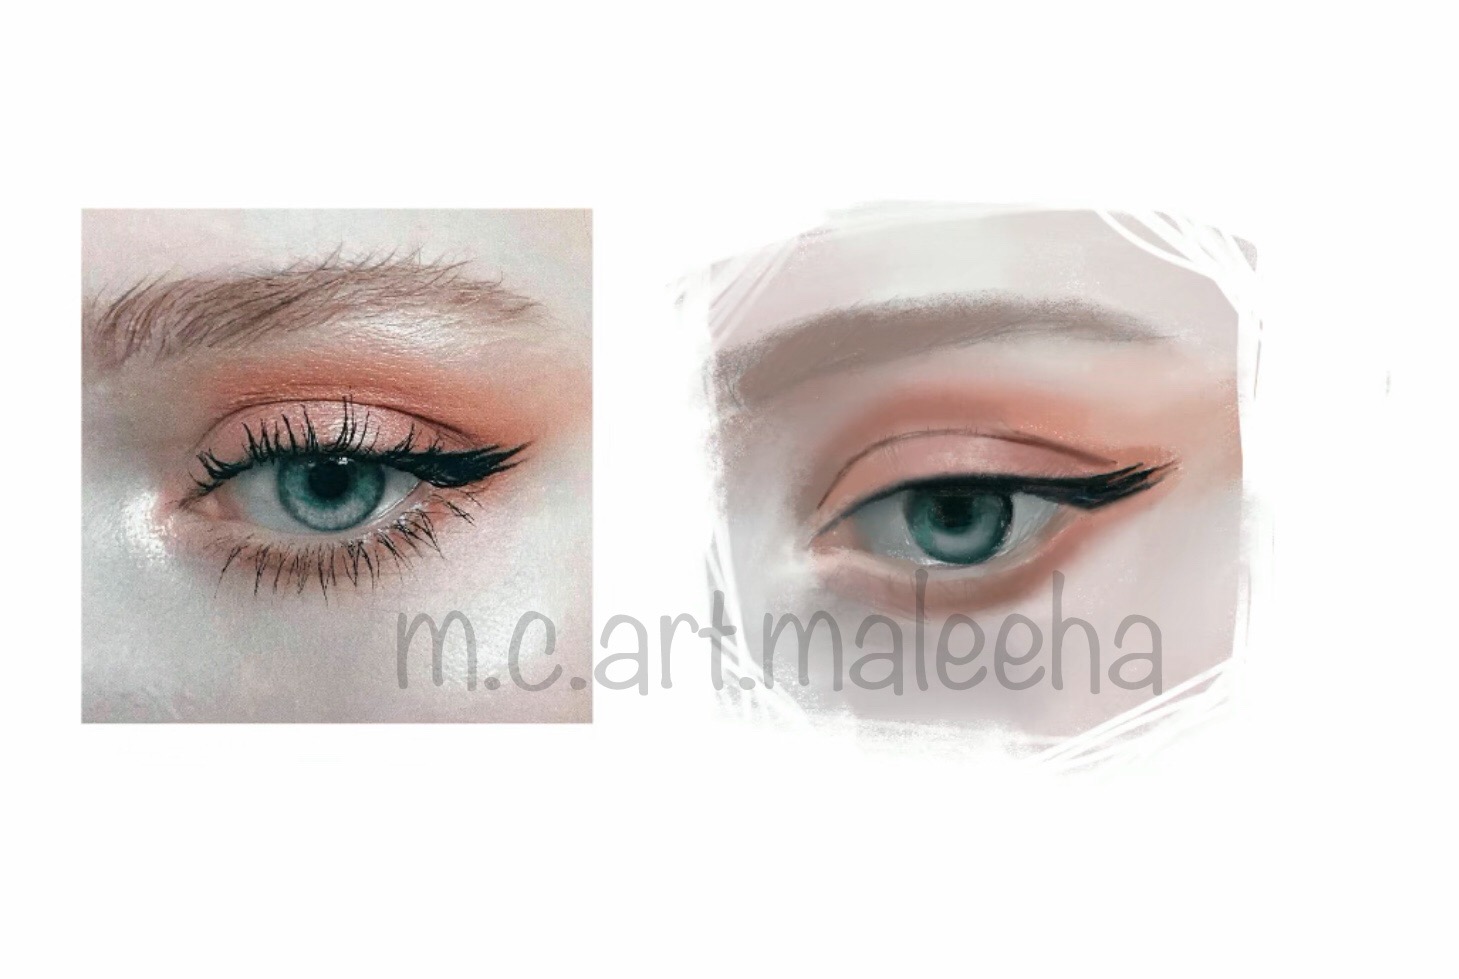
Then it’s time to blend. Keep the blending tool on light pressure, and try not to get the colors too blended into each other as this will result in a muddy image. The goal is to soften and smoothen the transitions between the values of light, medium and dark.
Step 4 – Finishing Touches
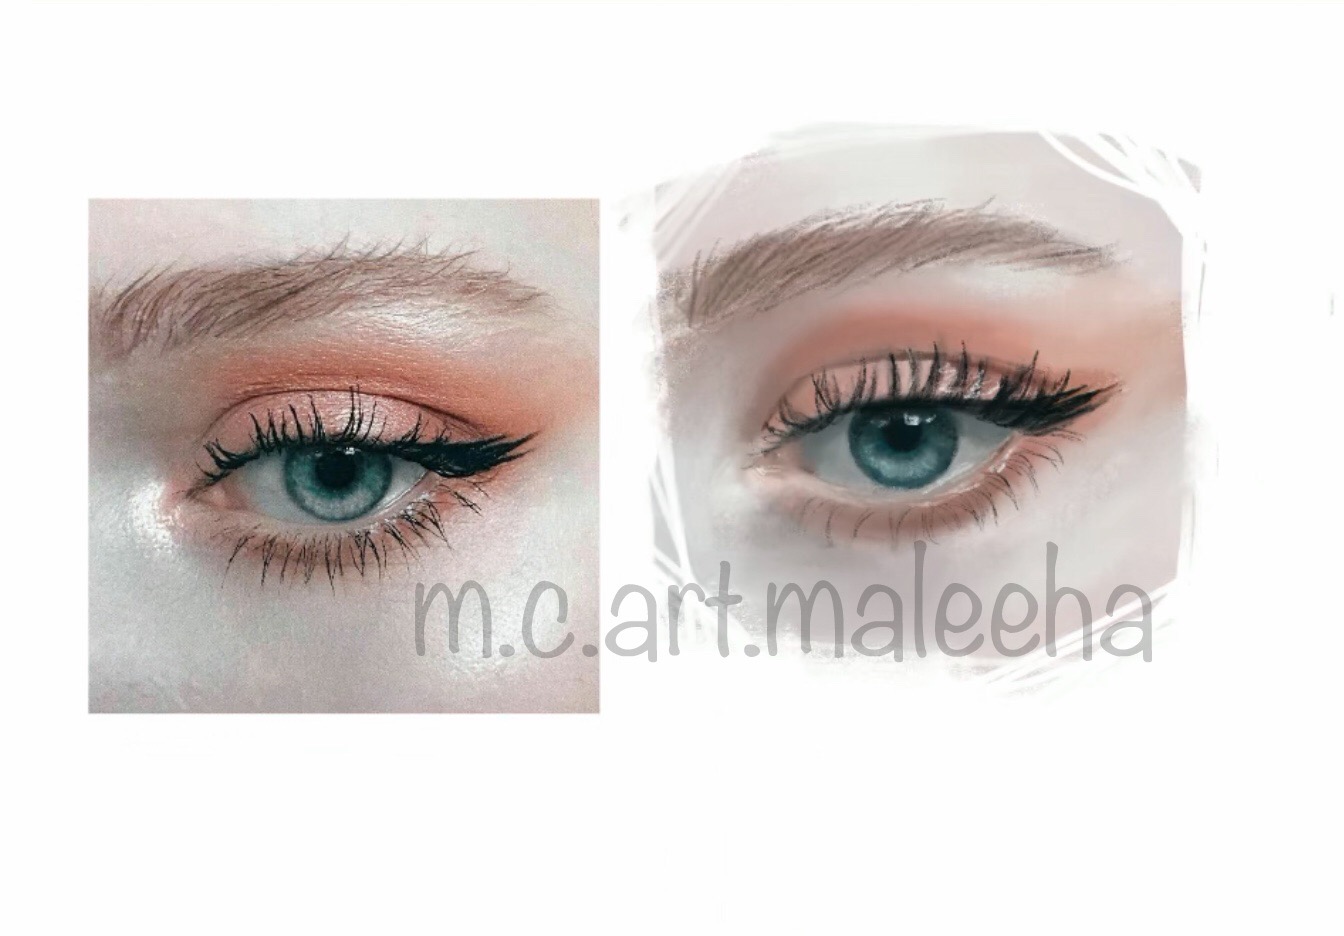
Final step is to add the finishing touches, aka the details that will add to the realism of the image. Focus on highlights, eyebrow hairs and eyelashes, you could even go the extra mile and add the slight variation of values in the iris and the pores in the skin.
And there you go! A simple quick tutorial on how to draw an eye. If you tried my tutorial, please do drop a comment and/or share your drawing with me. I would love to see it!
